
I made this Lighting McQueen pull string pinata for my son's 3rd birthday party. I had seen ones in different stores any where from $18-22, but I was able to make this one essentially for FREE as I only used items I already had around my house. Let me tell you how I made it....
Materials:

Car body:
1 cereal box (I used the smaller sized Kix box)
1 Kraft Mac and Cheese box
1 small gelatin box
1 styrofoam meat tray
1 Crystal Light plastic oval container
4 empty rolls from packer's tape
left over packers tape
black marker
heavy duty scissors
Paper mache:
newspaper cut in 1" strips
1 part flour
1 part water
Decorations:
Red craft paint
Black craft paint
Yellow craft paint
Roll of red streamers or crepe paper
scissors
glue
a few sheets of white paper/card stock
cellophane tape
20 - white 1/4" wide ribbon cut at 36" each
Directions:

Line up the tape holders on the sides of the cereal box where you want the wheels to be placed. Use a permanent market to outline on the side of the box.

Then using the tape rolls I marked out on the bottom of the box how deep in I wanted the wheels to go. I also mark out 3 sides of a square in the middle of the box for your trap door.

Then I cut along the lines. I saved the intact cut outs for the wheels and continued to cut around them to create circles to later use for the side walls of the tires. Next I used an exact-o knife to cut the trap door. You don't want to trim this up any as you need a good tight fit on the door so the sweeties won't fall out later.

Next to get some curve in the front I taped on the Crystal Light container. To create the top of my car and front windshield, I propped the styrofoam meat container on top of the gelatin box and taped that into position.

Next I loosened the ends of the the mac and cheese box to be able to bend it into a parallelogram. I taped it into that fixed position with some extra packing tape. This is my back spoiler for the car.

I tape the spoiler into position at the back of the cereal box. Next I filled some of the empty gaps between the meat tray and the mac and cheese box and in the front windshield area with some scrunched up newspaper. (Not pictured here: but I did build up some humps on either side of the hood to give Lightning a little more curve. See below in paper mache picture to see curves). Then I used some more packing tape to smooth out the lines around the car a bit.

Next I cut up loads of 1" wide newspaper strips and made up a 1 part flour: 1 part water paper mache mixture.

I dipped the newspaper strips in the flour/water mix and scrapped it off. Then laid the strips across the box to really smooth out Lightning's body. This step might be a bit overkill, but I wanted a smooth surface to paint my undercoat of red and it strengthens up all the little pieces put together to make the car's shape. Plus it helps to strengthen the underside of the car where all the cutting out was done. I propped this up on a colander on some newspaper to help keep it off the table. Let the paper mache dry overnight for best results.

Next I painted the whole car a cherry red color with regular craft paint to help cover up all the newspaper and help have a base color when I put on my frilled streamer paper. Let the paint dry as directed on your paint. You could also use red spray paint, but the craft paint is what I had at home. Also pain

To make the frilled paper to cover the car with, I took a roll of red crepe paper streamers and folded it over on itself about six inches long. I would it over about 6-8 times and then cut it off.

Next I would cut about 3/4 of the way up about 1/4" wide slits all the way across the paper.

I started underneath the car I started by running a bead of glue across the width of the car and then attached a strip of the frilled paper and cut if off at the side. Then ran another bead of glue about 1/2 above the last strip and attached another piece.
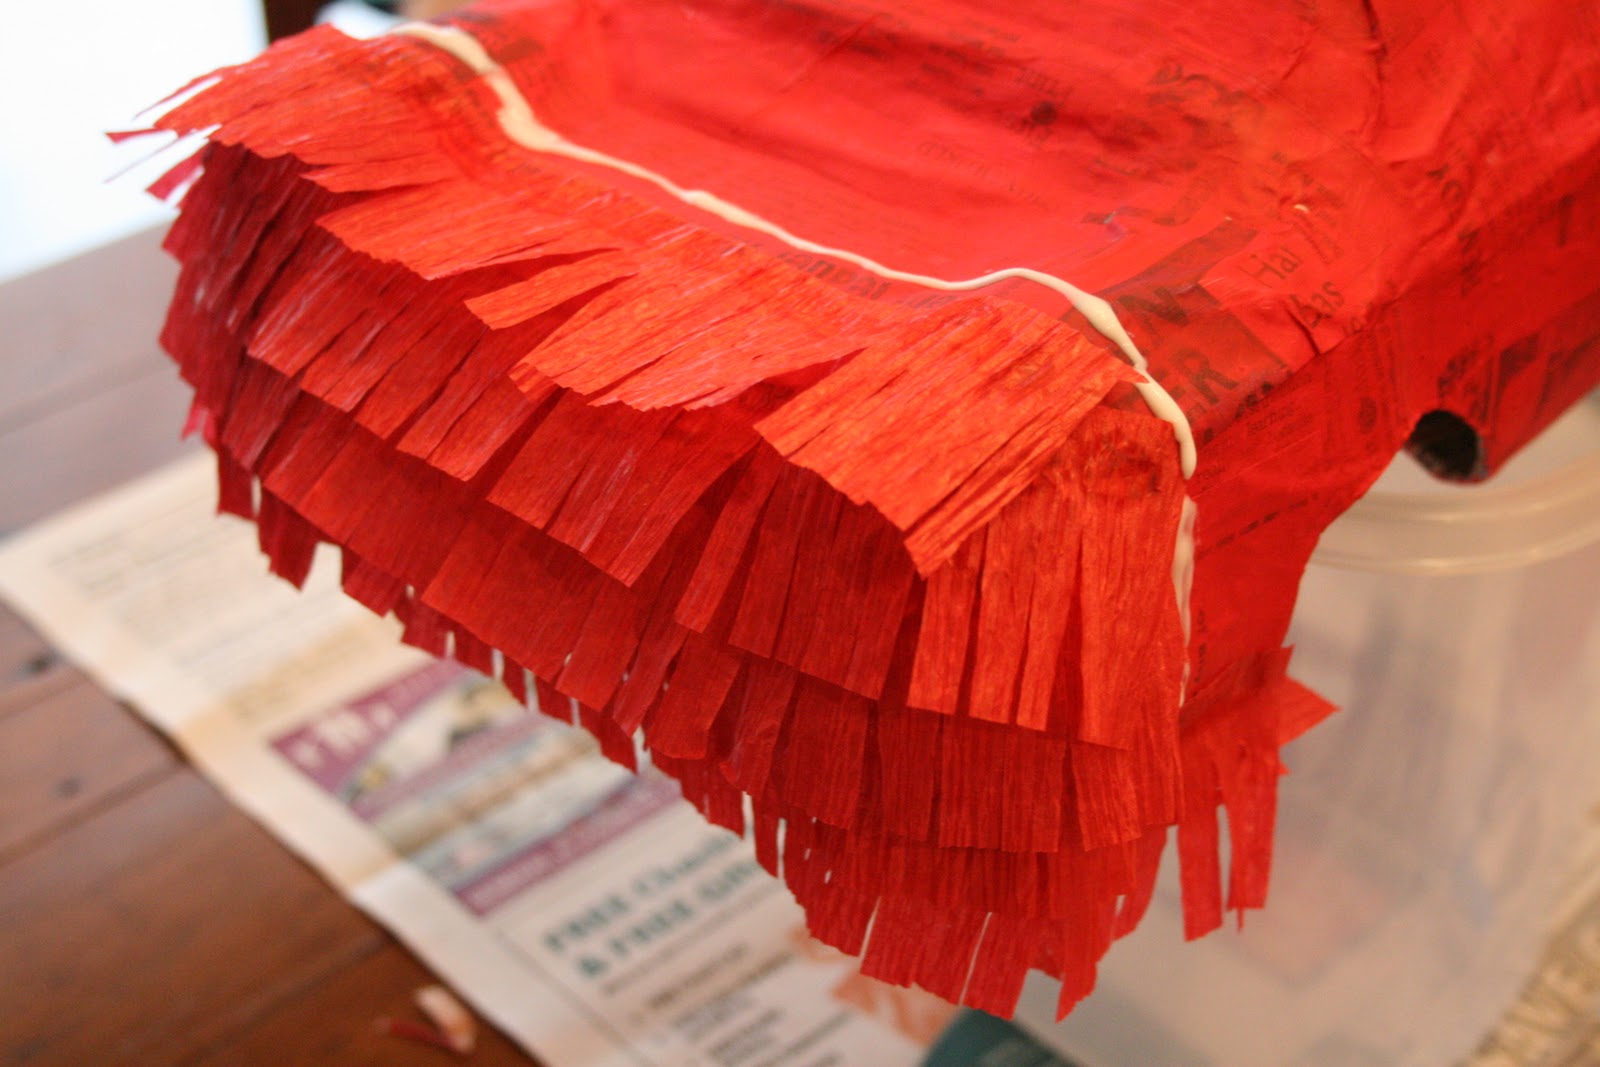
I continued this all the way up around the front of the car, on top of the hood and rest of the car.

Once I got to the back of the car I turned the frilled edge around so it would point downwards opposite the way the rest of the car was. I continued it down and underneath the car to the trap door opening.

To prepare the pull strings on the trap door I started with the real pull string. I poked a small hole in the trap door near the edge. I thread the string through from the inside of the trap door out and tie (may have to double tie) a big knot to keep it in place on the outside.

Then I secured the real pull string back into a random position and secure it down with a small piece of cellophane tape. Then with the rest of the other "fake" strings, I attach the very ends of them with a small piece of tape in a nice line along the trap door. Make sure that the little pieces of tape don't overlap each other so they can be pulled off clean and not affect any other strings.

Also allow about 3/8" - 1/2" between the taped rows so that you can glue down a small strip of the frilled paper to help disguise the strings. This is a little bit of a tricky step so I wanted you to just be aware of it when you try to do it yourself. When all the strings are attached turn the car upside down and grab the strings, trim them off at the bottom so that they are all even.

Next I attach the wheels that I created by filling in the tape rolls with newspaper. I took the cardboard cutouts and glued them to the outside of the wheel while taping the back side of it closed with newspaper inside. Finally I painted them black and let them dry.

Now that the car is covered with red frilled crepe paper and the strings are in place you can glue the wheels in place.

Now for the finishing touches.... I drew out the side lightning bolts, Lightning's face, and headlights on white paper and painted them. Once they were dry I cut them out and glued them on to the car.

I painted the red hub caps on the outside of each of the wheels.

I poked two small holes on either side of the car just above the front wheels. I fed through some thin yellow twine about 5 foot long. Then in the back I poked some tiny holes through the back spoiler to feed through a 3 foot piece of twine and tied it in a knot with the rest of the length to tie up with the front piece to make a pyramid point at the top to later attach the main rope to when it comes time to hang it up. I also had a CARS sticker book that I found the Rusteeze, 95, and lucky lightning bolt to put on the car, but you could draw and paint these as well.

Finally, fill up the car with sweeties. I had enough room for about 2 lbs of a candy mix.
When it comes to party time, attach a thicker rope to the connected strings and hang it up over a rafter or a tree branch, etc. Have the children line up and pull off one string at a time until it opens up and sweeties drop from the sky.
OMG- that is totally awesome!!! Great job and thanks for sharing.
ReplyDelete((( off to go Pin this ))) Dee
Great job and well done. I'm going to make a Mickey mouse (head) pinata for my daughter, she will be turning to 2 next month. Just wondering how do you secure the trap door to hold the 2 lbs of candy mix?
ReplyDeleteGreat question... If you cut your opening with a box cutter carefully so you don't have a gap...when you go to wrap it with tissue paper or paper mache it you will create a little bit of a ridge that seems to overlap slightly. If you are concerned that it won't be enough you could add a little extra wrapping of paper on the front edge of the trap door. You don't want to have too much so that the string can pull it with only a little resistance. once you fill the pinata with your candy flee the trap door carefully and turn it rightside up to see if it holds. If the bottom of the pinata is wider than just the trap door the weight of the candy should be distributed fairly well. I hope this helps...good luck and I would love to see a picture of your finished pinata...I would feature it on my blog. Thanks, Corrina
DeleteIs it hard to break the pinata open... with all that tape ?
ReplyDeleteIts an awesome home-made idea , but i just wanna know if its complicated to break open .
This type of piñata isn't designed to be hit and broken open...it's a pull string one.
DeleteWoooow ... it looks great.. my son is crazy about lightening.. and as we live in the Persian Gulf not may products are avialable here... I will try to do this thanks a lot for sharing .. I never thought I would find out how to make it .. you made my day :)
ReplyDelete