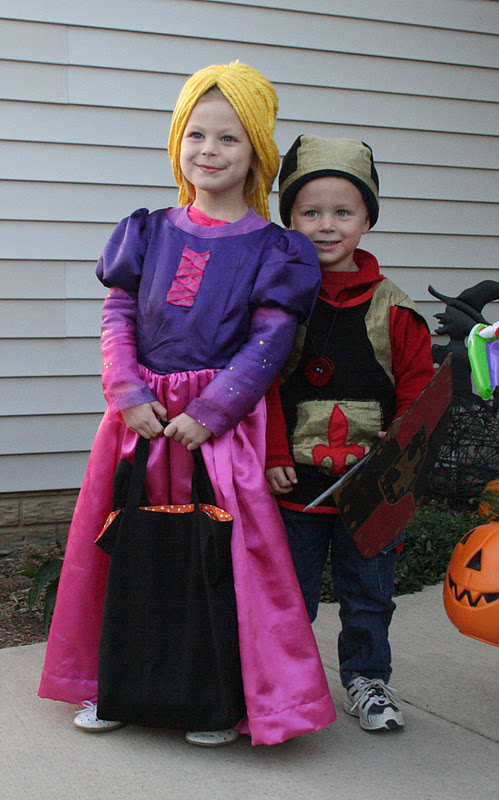
My daughter LOVES the movie Tangled and for Halloween she wanted to be Rapunzel. How fitting it was that my son wanted to be a knight so they had the whole fairy tale thing going on together. This dress challenged me to no end but it did end up turning out very nice and my daughter absolutely loved it and didn't ever want to take it off. She picked out the fabric we used and asked me everyday when I was going to finish sewing it. So here it is along with the infamous long haired wig that she wore for Halloween as well.

I bought the McCall's M6420 pattern to make my little girl's Rapunzel's costume. Lucky for me that costume fabric was onsale for $2/yard that day as this little dress took over 4 yards of material to make (3+yards just for the skirt part!!!).
The Rapunzel wig was most imperative to the whole costume, so I got pretty creative with this one. I found a few instructions online on how to make up a child's wig but then I improvised and this is how I made my daughter's wig.
Materials:
- 1 pair of medium sized panty hose/tights
- 1 skeen of thick yellow yarn (could have probably used two really but it's what I had at the time)
- matching thread
- scissors
- low temperature glue gun

Here's how I made the wig:

At the top of the panty hose/tights, I measured about 5 inches down and cut about 1" beyond that. Cutting a small piece of the yard I tied off the end I was holding in a couple tight knots.

Then I turned the panty hose cap inside out.

Next I found a piece of cardboard about 36" long and started wrapping the yard around it.

I would wrap around about 10 times then tie off the top to make several small hair sections. I only got about 5 1/2 full sections made out of my skeen of yarn, but if you used more skeens you'd want to aim for about 12-14 sections for a really full head of hair. Holding the tied section, I pulled the hair down and cut the loops to make straight hair.

Using the center seam of the hose/tights for my middle part of the wig, I would sew the middle knots of the hair pieces to the seam of the hose catching part of the knots.

Each hair section would follow in line down the part line and then separate the hair to either side. Once I reached the back part of the crown of the head I sewed on my final section and then pull that hair all towards the back.

To help me hold the wig in a good shape I put the panty hose cap over a tall bowl and laid the hair down how I would want it to fall.

Then using a cool temp glue gun, I started gluing down the underside of the hair to the pantyhose cap. The key thing to remember when doing this is to keep the cap pulled tight and not the hair up from the bottom of the cap about 2 inches. Because once you glue it in place it won't have any give it in to fit on the person's head.

I ended up gluing down only about the back 2/3 of the hair in order to cover the cap. This is what it looked like when I had it secured in place.

Once the back hair was secured, I used the front 1/3 of the hair to pull back and create a fun braid. This helped me be able to create a nice low parting bangs in the front of the wig and get Rapunzel's famous braid from the "Tangled" movie.
So cute and creative!! Awesome job on both the wig and dress!
ReplyDeleteFantastic. I'm going to try and make a Rapunzel wig for my daughter. Thank you so much for sharing your instructions.
ReplyDelete